
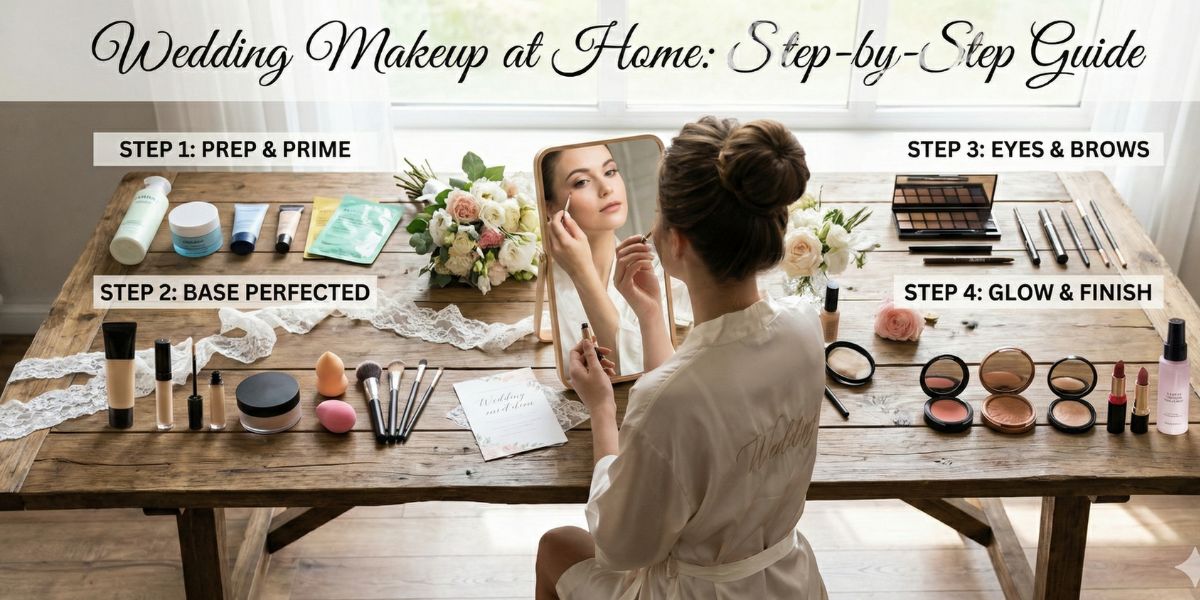
Wedding Makeup at Home: Step-by-Step Guide
Weddings are special occasions that call for flawless makeup, but not everyone wants to go to a salon. With the right products, techniques, and planning, you can achieve professional-looking wedding makeup at home.
Why Home Wedding Makeup Works
- Cost-effective: No expensive salon charges.
- Personal control: You can customize the look to your style.
- Comfort: No waiting in salons; you control timing and products.
- Practice-friendly: You can rehearse the look before the big day.
Step 1: Skin Preparation
Wedding makeup lasts longer when the skin is well-prepped.
- Cleanse: Use a gentle face wash to remove dirt and oil.
- Exfoliate: A mild scrub removes dead skin cells and smooths the skin.
- Moisturize: Apply a lightweight moisturizer suitable for your skin type.
- Prime: Use a makeup primer to create a smooth base and help makeup stay longer.
Tip: For oily skin, use a mattifying primer; for dry skin, use a hydrating primer.
Step 2: Base Makeup
- Foundation: Choose a long-lasting foundation that matches your skin tone. Apply with a beauty blender or brush for even coverage.
- Concealer: Hide dark circles, blemishes, and pigmentation with a creamy concealer.
- Setting Powder: Use a translucent powder to prevent the foundation from creasing.
Step 3: Eyes
- Eyebrows: Shape and fill brows with a pencil or powder for a natural look.
- Eyeshadow: Use neutral or wedding-appropriate shades. Blend darker colors on the crease for depth.
- Eyeliner: Apply liquid or gel eyeliner for sharp definition.
- Mascara: Curl lashes and apply mascara to make eyes pop. Optional: Add false lashes for extra glam.
Tip: For Indian weddings, gold or bronze shimmer works beautifully with traditional outfits.
Step 4: Cheeks
- Blush: Choose a shade that complements your skin tone; apply to the apples of the cheeks.
- Highlighter: Apply on cheekbones, nose bridge, and cupid’s bow for a radiant glow.
- Contour (Optional): Light contouring on jawline, nose, and cheekbones adds dimension.
Step 5: Lips
- Lip Liner: Outline lips to prevent feathering.
- Lipstick: Choose long-wear lipstick in shades that match your outfit. Matte or satin finishes work well.
- Gloss (Optional): Add a touch of gloss for extra shine.
Step 6: Setting the Makeup
- Use a setting spray to lock makeup in place.
- Blot any excess oil with tissues to prevent shine, especially in humid weather.
Extra Tips for Perfect Home Wedding Makeup
- Lighting: Use natural light or bright LED lights for accurate color matching.
- Trial Run: Practice the complete look at least 2–3 days before the wedding.
- Minimal Touch-Ups: Carry compact powder, lipstick, and blotting sheets for touch-ups.
- Focus Areas: Pay extra attention to eyes and lips; they make the biggest impact in photos.
How Many Days Before a Wedding Should You Get a Facial?
Before the Makeup
- Ideal Timing: 7–10 days before the wedding
- Reason:
- A facial improves skin texture, removes dead skin cells, and hydrates the skin.
- Your skin may experience mild redness, irritation, or breakouts immediately after the facial. Doing it 7–10 days prior gives the skin enough time to calm down and settle.
- Allows your skin to absorb any serums or treatments fully, making the makeup go on smoother.
- A facial improves skin texture, removes dead skin cells, and hydrates the skin.

How Many Days After Makeup Should You Get a Facial?
If you’ve recently applied bridal or heavy makeup, it’s important to give your skin time to recover before getting a facial.
Recommended Timing:
- Wait at least 3–5 days after heavy makeup before getting a facial.
- Reason:
- Makeup products, especially foundation, primer, and setting powders, can clog pores and leave residue.
- Skin may be slightly irritated or dehydrated after long hours of makeup.
- Waiting allows the skin barrier to recover, reducing the risk of redness, breakouts, or irritation during the facial.
- Makeup products, especially foundation, primer, and setting powders, can clog pores and leave residue.
Why Your Skin Feels Smooth After a Facial Post-Makeup
After wearing heavy makeup, your skin accumulates:
- Makeup residues (foundation, concealer, powders)
- Dirt, sweat, and sebum
- Dead skin cells
When you get a facial after makeup, these are removed through cleansing, exfoliation, and treatments, which provides several benefits:
1. Deep Cleansing
- A facial removes all trapped makeup particles that normal cleansing may not fully remove.
- Cleared pores allow the skin to breathe and reduce the chance of breakouts.
2. Exfoliation
- Removes dead skin cells, which smoothens the skin surface.
- Improves texture and makes the skin feel soft, like a fresh canvas.
3. Hydration and Nourishment
- Facials include serums, masks, and moisturizers that replenish lost moisture.
- This makes the skin plump, soft, and naturally glowing.
4. Improved Circulation
- Massage during facials increases blood flow, giving the skin a healthy glow and natural radiance.

Result:
After a facial post-makeup, your skin feels soft, smooth, and fresh, almost like before makeup, because:
- All residues are removed
- Dead cells are exfoliated
- Skin is hydrated and nourished
Tip: To maintain this smoothness, follow up with gentle cleansing, moisturization, and sun protection.

In Beauty Home Salon – Zirakpur
Get clear, glowing skin naturally! 💧
Gentle facials, natural care, and expert tips to keep your skin healthy and radiant. 🌿
📍 Zirakpur | Chandigarh | Panchkula | Mohali
Final Thoughts
With preparation, practice, and patience, home wedding makeup can look just as good as a professional one. The key is to enhance your natural beauty, choose long-lasting products, and blend carefully for a flawless finish.